Microsoft “Project Siena” is an awesome Windows 8 app that let’s you design and create highly customized and data rich apps for Windows 8 without writing any code or using Visual Studio. It let’s you leverage your experience designing PowerPoint decks and writing Excel formulas to get something up and running very quickly.
Siena is still in beta, and it doesn’t officially support creating apps you can publish to the Windows Store “as-is” per it’s release notes. This may be a bummer if you just spent a weekend making a a beautiful Windows 8 app and you want to share it with the world. In this post, I’ll walk you step-by-step how to get your Siena app published to the store without installing Visual Studio. Caveat: If your app uses the webcam, or a live connection to the internet, this guide will not help you as it requires turning off these capabilities.
Step 1: “Publish” your app files from the Siena app
Siena has a feature where you can “Publish” or essentially export your Siena project to an intermediate app state. To do this after you finish building your app, just go to the File menu and select, “Publish.”
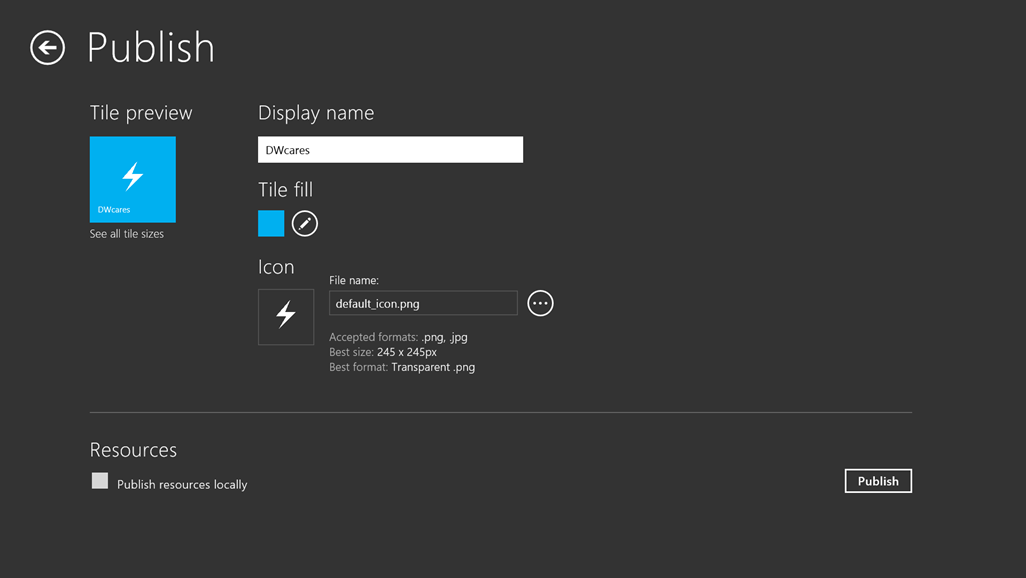
On the Publish screen, enter a display name, choose your tile fill color and icon, then click publish. Make sure to publish to a folder that you can easily find, I chose desktop.
Step 2: Create the appx package
Step 2: Create the appx package
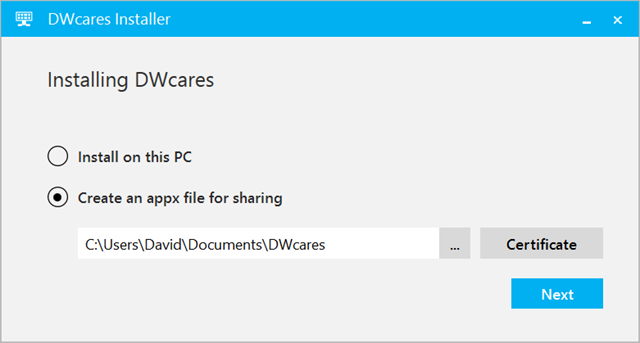
After you publish there is an “InstallApp.exe” file that let’s you install the app on your local PC, or create an appx file for sideloading on other PCs. Launch InstallApp.exe, and choose the option to “Create an appx file for sharing.” This will generate an .appx file that we’re going to use in a later step.
Step 3: Create your Windows Store app registration
Step 3: Create your Windows Store app registration
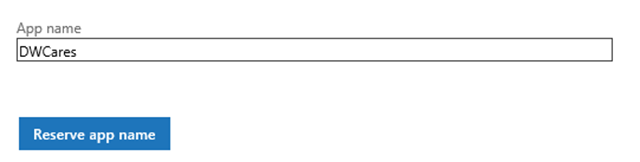
The next step is to create your Windows Store app registration. If you don’t already have a Windows Store Dev Center Registration, navigate here to get one. My app is called DWCares, so I reserved that name.
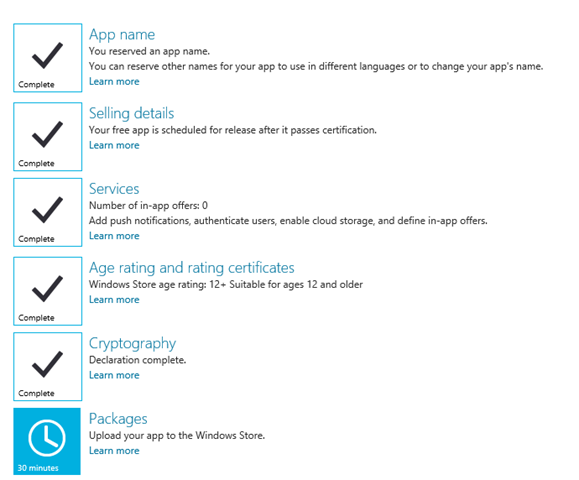
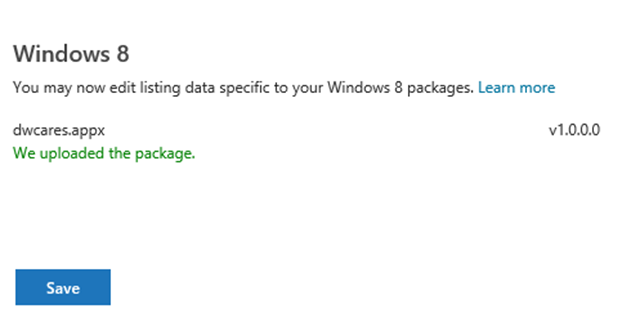
Follow the on-screen steps for app registration, until you get the the Packages step. Open that module and upload the .appx file we generated in Step 2. Mine is called DWCares.appx.
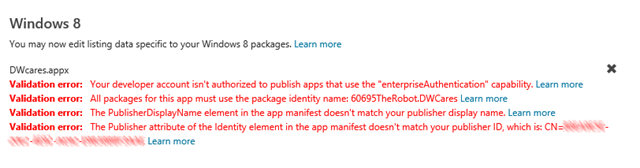
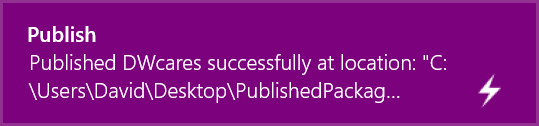
You will get a bunch of errors that look like this. Don’t worry! We’re going to fix them, but you need this output to fix them, so keep this page handy.
Step 4: Modify the AppxManifest.xml for your account
Navigate to the folder that Siena originally exported in step one, and launch the AppxManifest.xml file in a text editor. You are going to edit a few attribute values to match your Dev Center account.
Update Identity name and publisher Identity name has to match the Package Identity name value that you saw in the error when you uploaded your package. Identity Publisher has to match the “CN=” Publisher ID value in that same error.
<Identity Name="DWCares" Version="1.0.0.0" Publisher="CN=David@SNACKPRO" ProcessorArchitecture="neutral" />
Update DisplayName and PublisherDisplayName
DisplayName has to match the name for the app that you reserved, publisher display name has to match your Windows Store app publisher name. For me: “The Robot”
<Properties> <DisplayName>DWcares</DisplayName> <PublisherDisplayName>Siena</PublisherDisplayName> <Logo>images\default_icon_storeLogo.png</Logo> </Properties>
Remove all declared capabilities
Siena auto-declares a bunch of capabilities that you may not be using, and you need a privacy statement in your Settings charm to use. Since Siena doesn’t provide a way to change the Settings charm you can’t use the capabilities in your app. Delete them all from the manifest.
<Capabilities> <Capability Name="internetClient" /> <Capability Name="enterpriseAuthentication" /> <Capability Name="privateNetworkClientServer" /> <DeviceCapability Name="webcam" /> <DeviceCapability Name="microphone" /> </Capabilities>
Other manifest changes At this point you can make additional manifest changes according to the documented appmanifest schema. You might want to add a wide tile, a different splash screen, or change your tile color. Be careful when you edit the manifest as it won’t package our app if you don’t follow the schema.
Step 5: Create and upload the modified appx
This step requires the Windows 8 SDK. If you have Visual Studio 2012 or 2013 installed, you already have it, but if you dont you may need to download it. We are going to use a tool called MakeAppx.exe that will re-package our app into an appx with the new manifest.
C:\Program Files (x86)\Windows Kits\8.0\bin\x64\makeappx.exe pack
/d c:\PublishedPackage\DWCares /p c:\PublishedPackage\DWCares.appx
Run MakeAppx.exe from the command-line and feed it the folder that Siena exported with the AppxManifest.xml file and an export folder. It will output the log of progress to the console, but there shouldn’t be any errors. If you see an error, check your appmanifest.xml edits and try again.
Navigate your browser back to the Windows 8 Dev Center, and upload the appx file you just generated, and you shouldn’t see any new errors. Click the ‘x’ next to the previous uploaded package to clear the old error.