Web Tiles are a simple way to show tiles on your Microsoft Band without needing to write an app. The tiles update from a web url. As far as I can tell, the web url must return json data. This data can be whatever but it needs to be open to everyone meaning no authentication. All of the articles today talk about the structure of a web tile and what each piece means. All this information is great, but if you only need a simple tile you can do without it.
Along with the release of Web Tiles, Microsoft also released a Web Tiles Authoring website. This website walks you through creating a new tile step by step. Let’s take a look at how this works
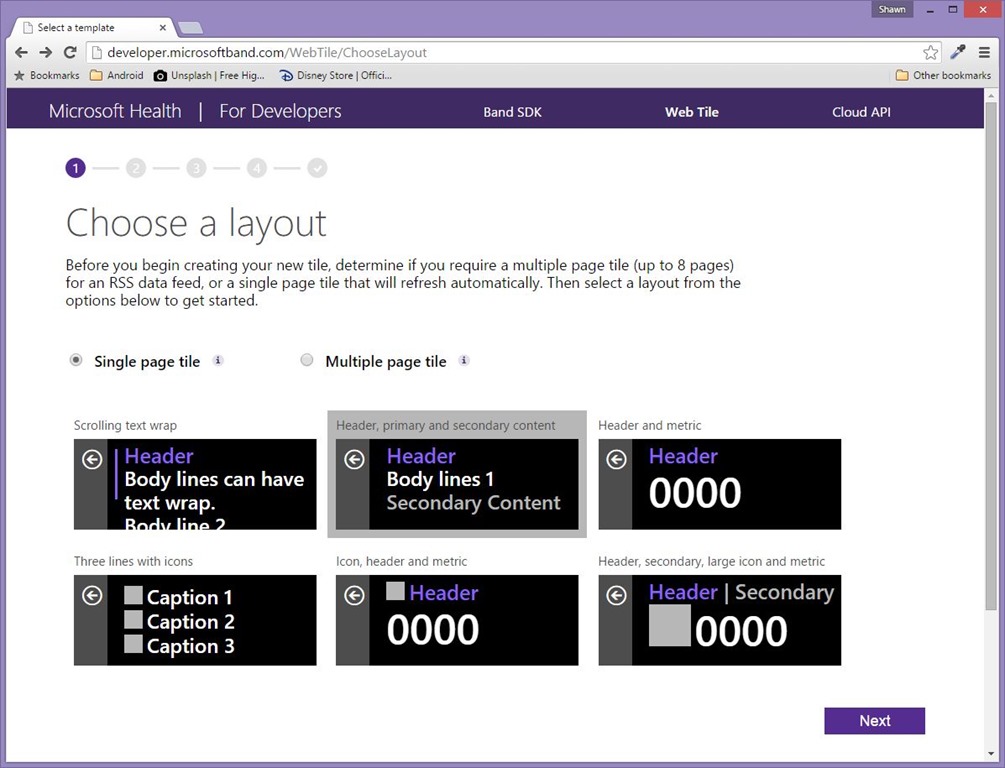
Step 1: Choose a layout
Here you pick which of the six layouts you’d like to use for the tile. You can choose from displaying a single page tile or multiple page tile. Multiple page tiles must link to an RSS or ATOM feed. This is not a requirement of web tiles; it is only a requirement for the authoring tool. Web tiles can have multiple pages without needing an ATOM or RSS feed.
Along with the release of Web Tiles, Microsoft also released a Web Tiles Authoring website. This website walks you through creating a new tile step by step. Let’s take a look at how this works
Step 1: Choose a layout
Here you pick which of the six layouts you’d like to use for the tile. You can choose from displaying a single page tile or multiple page tile. Multiple page tiles must link to an RSS or ATOM feed. This is not a requirement of web tiles; it is only a requirement for the authoring tool. Web tiles can have multiple pages without needing an ATOM or RSS feed.
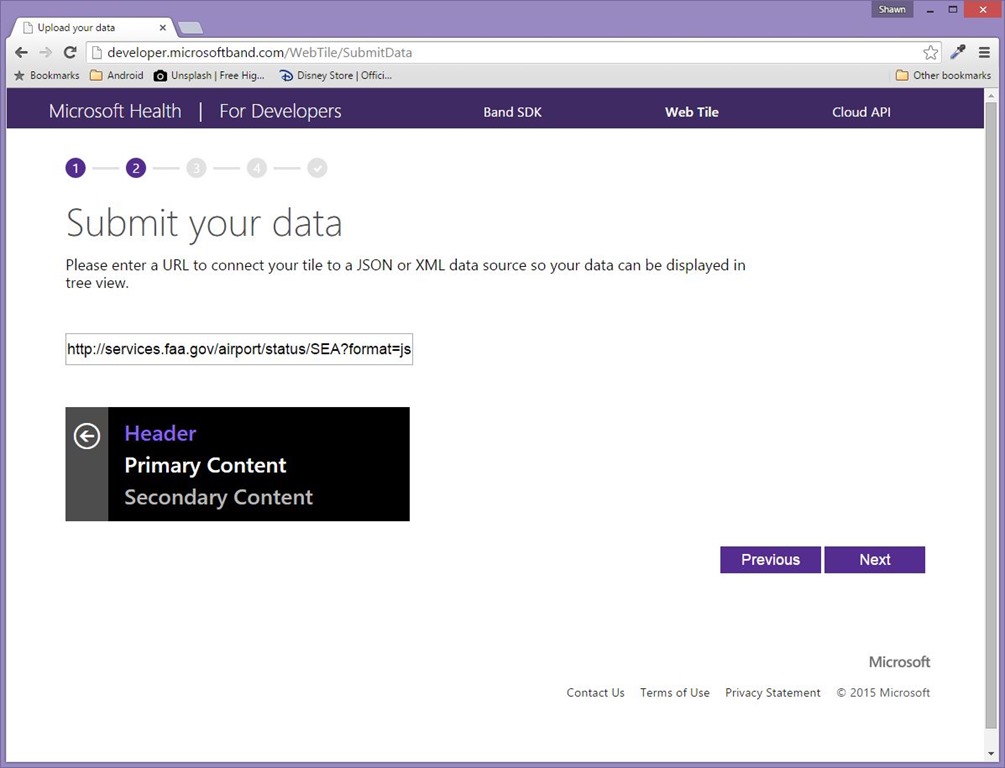
Step 2: Assign the url
Here you enter the url that will contain the data for your tile. If you picked a multiple page layout from Step 1, you must enter a URL for RSS or an ATOM feed. Again, this is not a requirement for web tiles, only for the authoring tool.
Here you enter the url that will contain the data for your tile. If you picked a multiple page layout from Step 1, you must enter a URL for RSS or an ATOM feed. Again, this is not a requirement for web tiles, only for the authoring tool.
Step 3: Selecting information to display
Here you select what information from your json feed you would like to display. You simply drag the data from the right and drop it onto the place you’d like to display it.
Here you select what information from your json feed you would like to display. You simply drag the data from the right and drop it onto the place you’d like to display it.
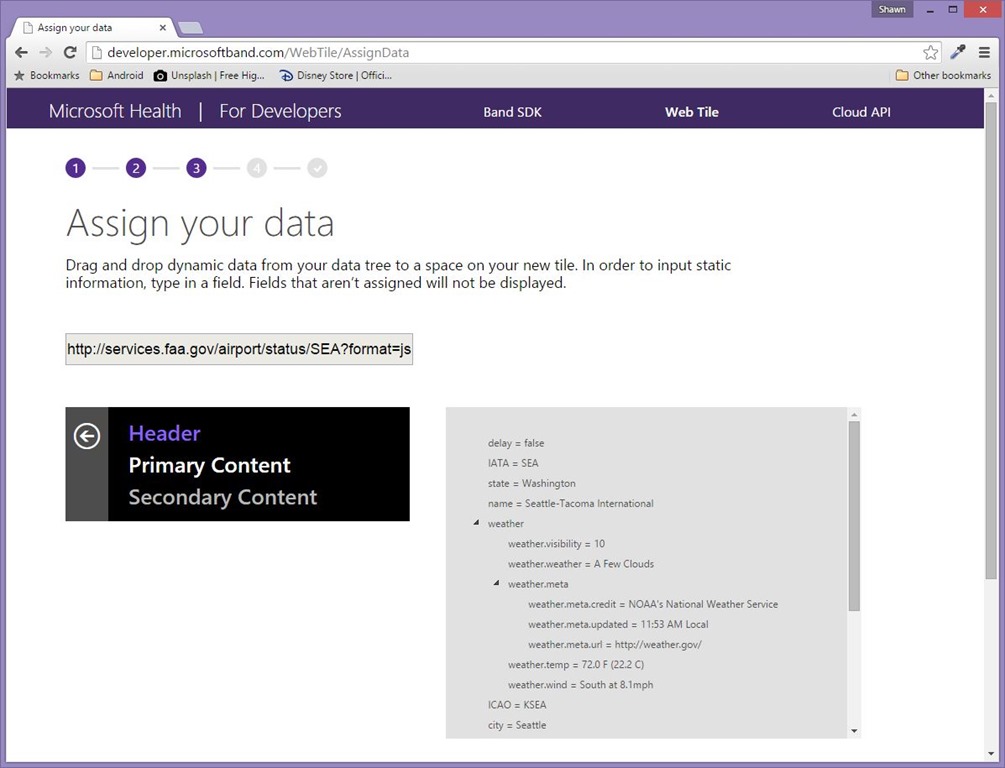

Here we see that I selected to display the weather with the state being the header, the second line being the temp and the third line being some description.
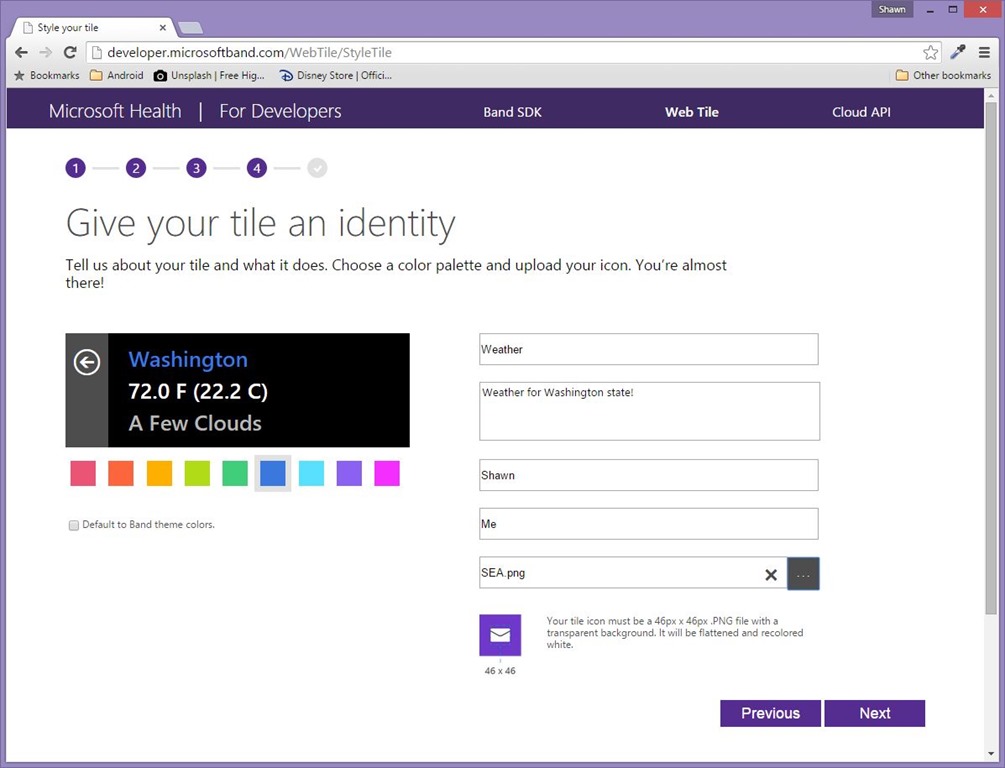
Step 4: Make it yours
Here you’ll set the information to make the tile yours.
Step 4: Make it yours
Here you’ll set the information to make the tile yours.
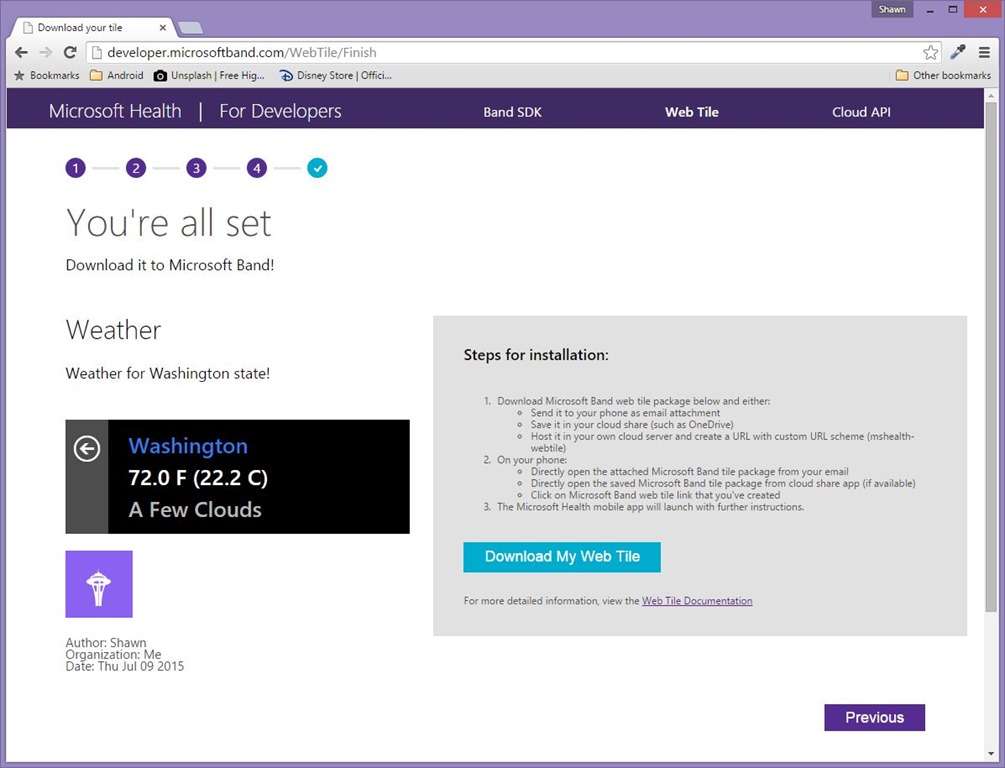
Step 5: Download!
Download this awesome web tile to send to your favorite people
Download this awesome web tile to send to your favorite people
References:
http://visuallylocated.com/post/2015/07/09/Easily-create-Microsoft-Band-Web-Tiles-with-the-Web-Tiles-Authoring-website.aspx
http://visuallylocated.com/post/2015/07/09/Easily-create-Microsoft-Band-Web-Tiles-with-the-Web-Tiles-Authoring-website.aspx

