|
Prerequisites
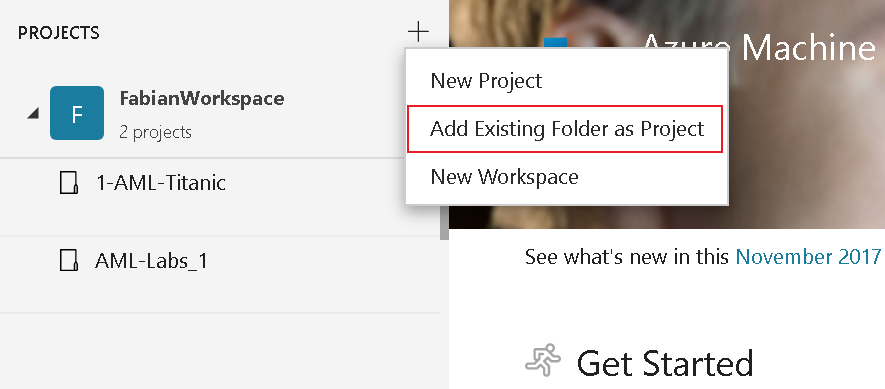
Setup
 If it is not possible to add the folder, please copy just the Titanic example to a different folder
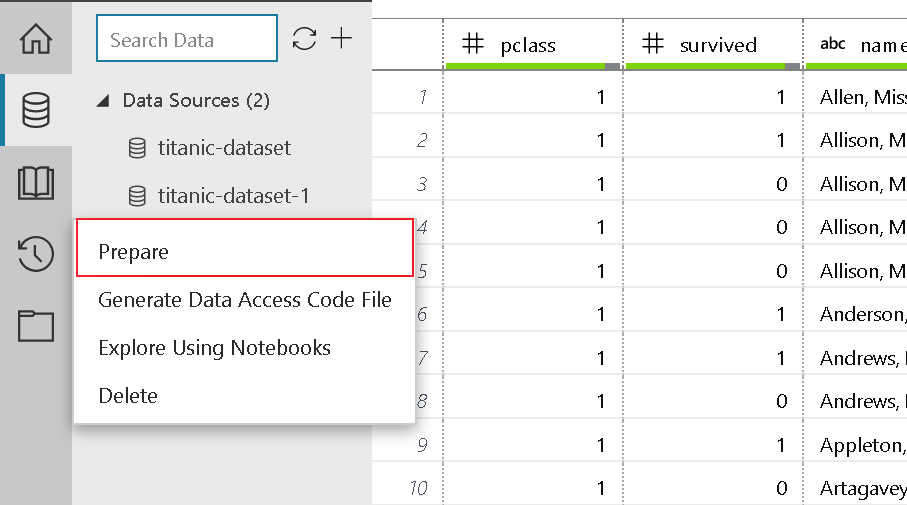
Get your Data in place Preparing the data is one of the key steps for your first ML experiment. This step includes renaming of columns, filtering (e.g. removing null val]ues), transforming values and changing the data type.
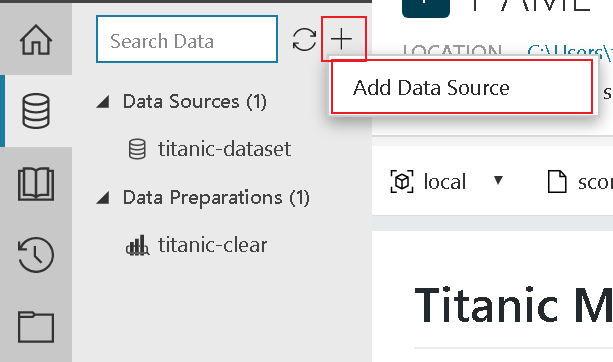 (Please note: The project you cloned already has a fully prepared dataset included. However, to get a glimpse of how things work we recommend to try it out on your own.) Data Exploration In the titanic.csv file you can find the data imported and used in the model creation. Before we get started with preparing the data for the experiment, let's have a quick look at what the data is about. 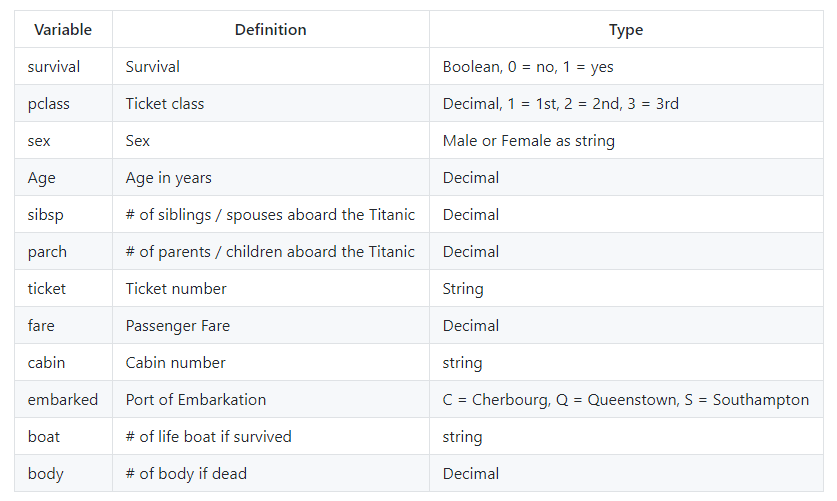 To get to know your data even better by exploring certain statistical figures click on Metrics in the top bar of the data section: 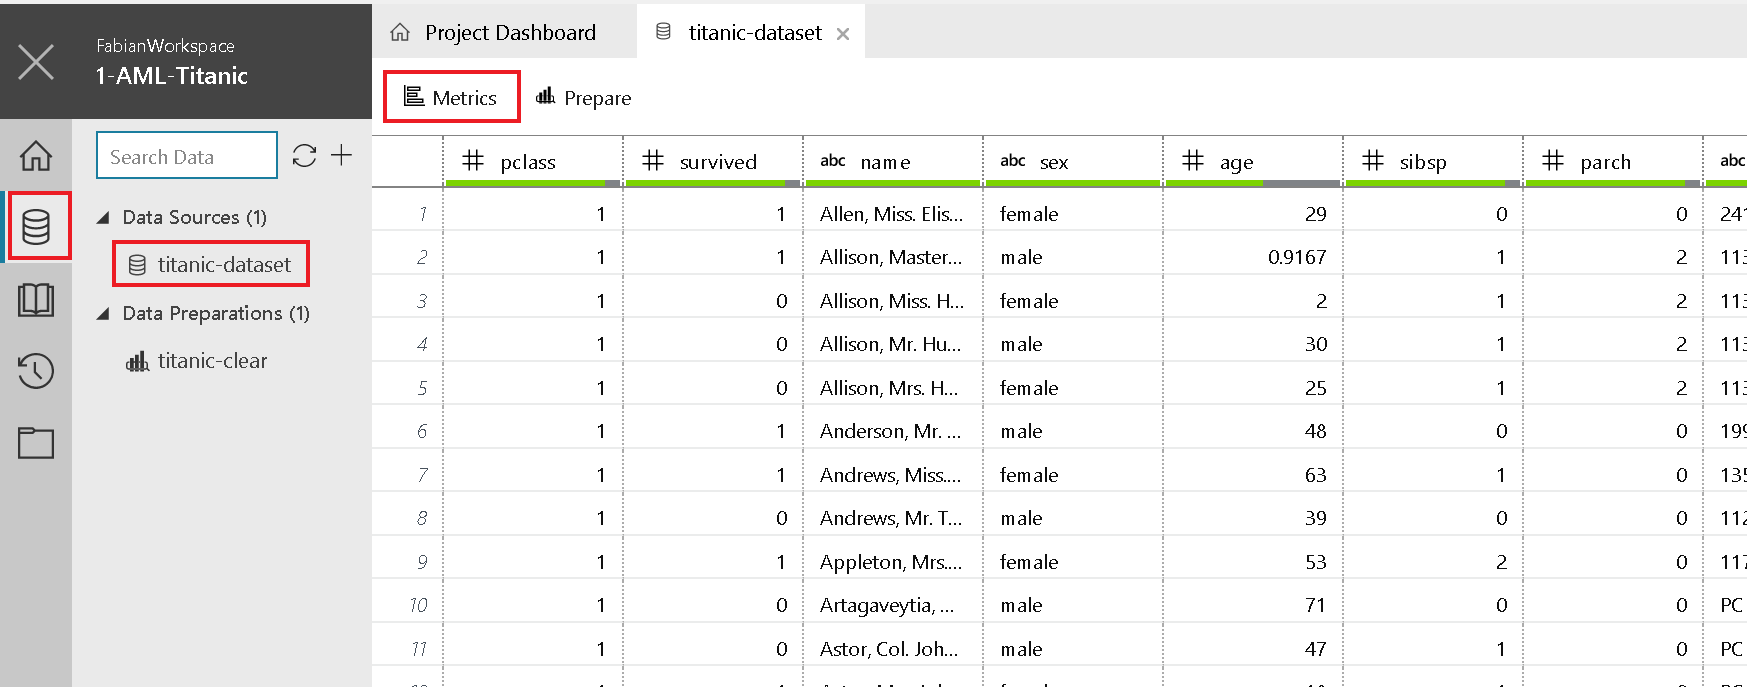 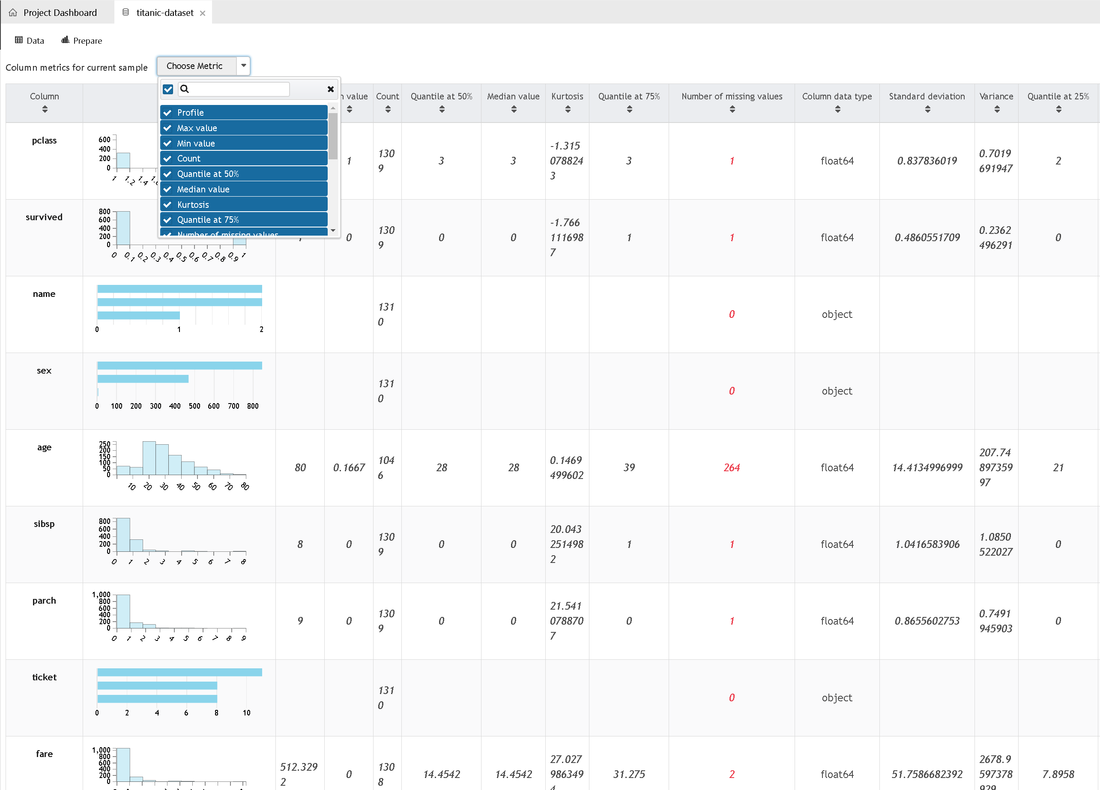 Data Preparation Now it's time to get our hands dirty and prepare our data. The following steps are about getting rid of data we don't need, removing incomplete data and transforming data types, but let's take one step after the other:
 Repeat this for the columns fare and age
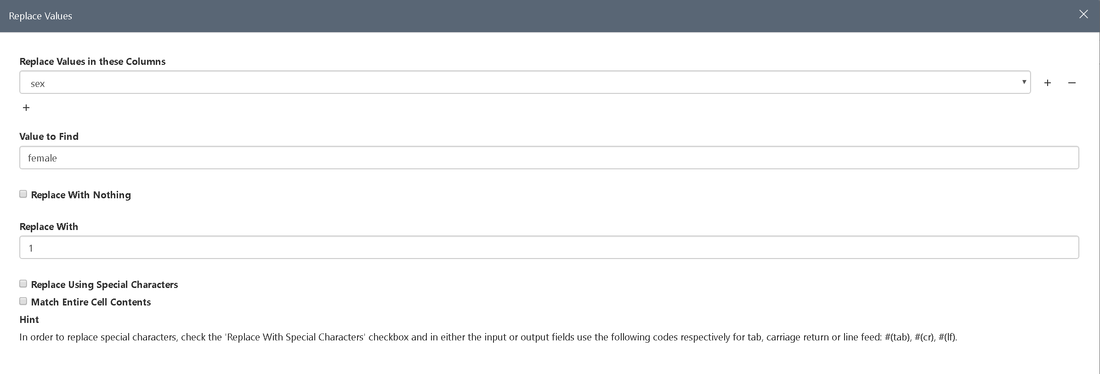 Repeat this for male. To make sex a numeric value we only have to click on the column header and select the numeric option.
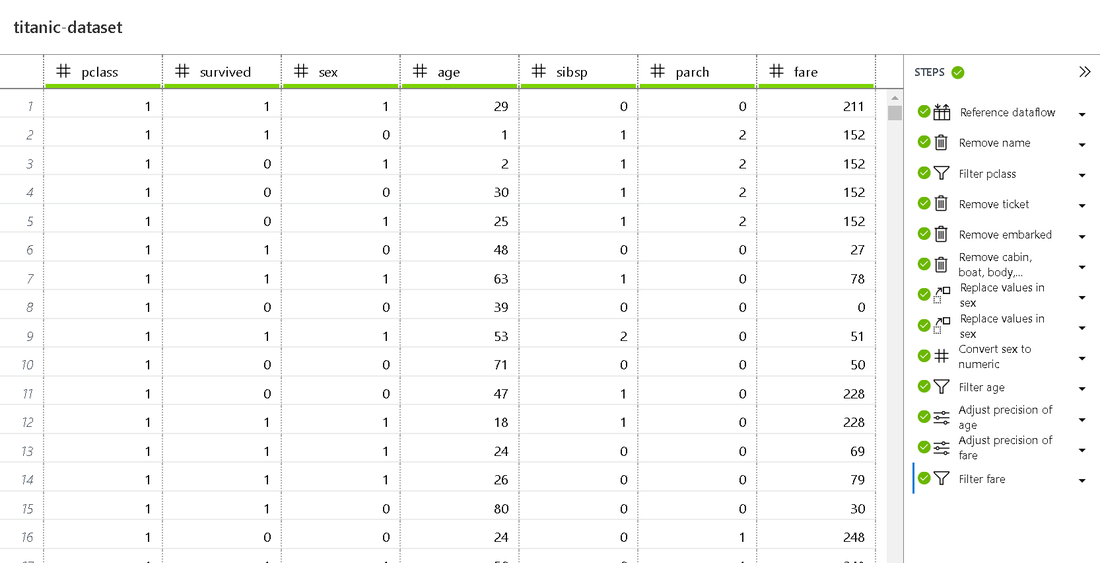 Here you can view, change and edit single steps performed during the preparation process. The result of the above-mentioned steps should be the same as the dataset prepared in the demo. For more information on how to prepare data in Azure Machine Learning Workbench, see the Get started with data preparation guide. Develop the Model At this stage we have our data sources configured and prepared for the fun part you've probably been waiting for - developing the ML model. To make things a little bit easier, we already added the train.py file to the project. Open the file and try to make yourself familiar with the code. Basically the script performs the following steps:
The deserialized model, saved in the ouputs folder, can later be used to make a prediction on a new record but first things first. Run your Python Script We are now ready to run the script on your local computer.

After running the script 2-3 times feel free to check the results in the Jobs History. 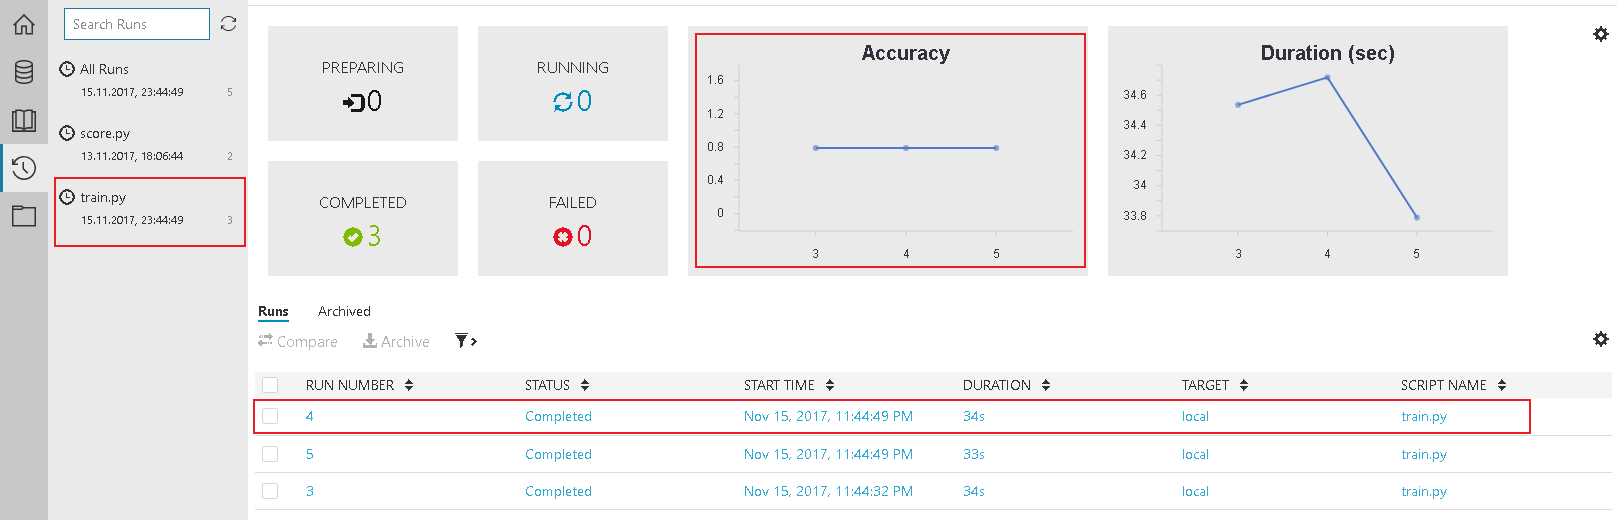 Accuracy shows you how accurate your script works. The list of Jobs below show a historical list of the scrips you ran. By selecting one job you get a detailed overview. 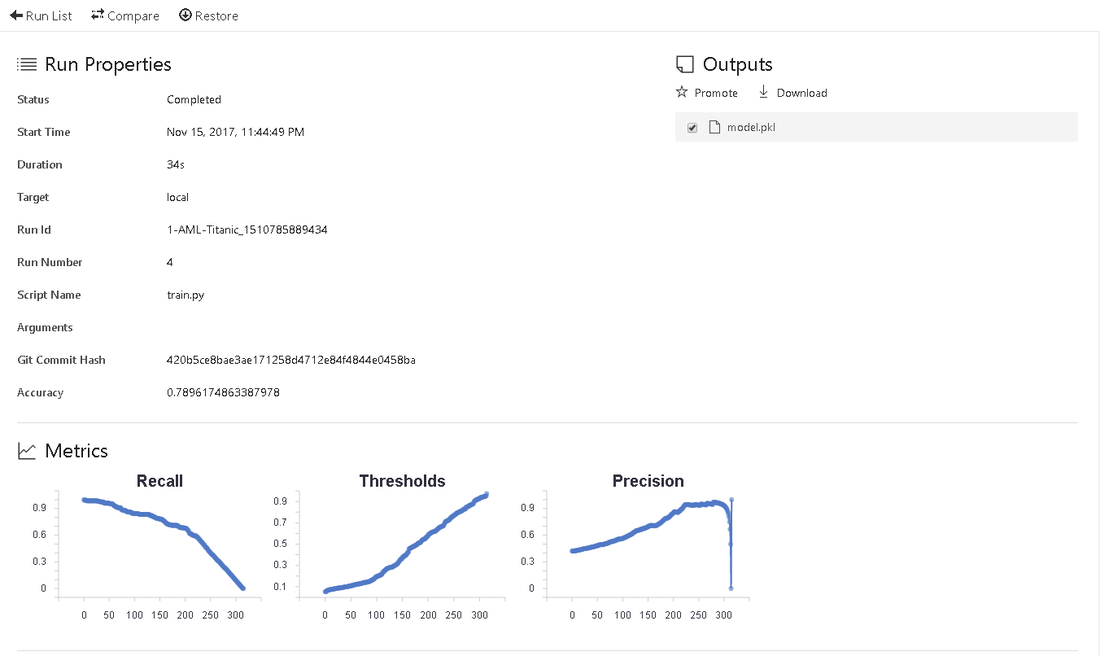 Deploy your Model Before we can think about deploying our experiment we have to figure out, if our model actually works. Therefor, it is important to download and save the model, created by our train.py script. The model.pkl file is saved in the output section of the log. 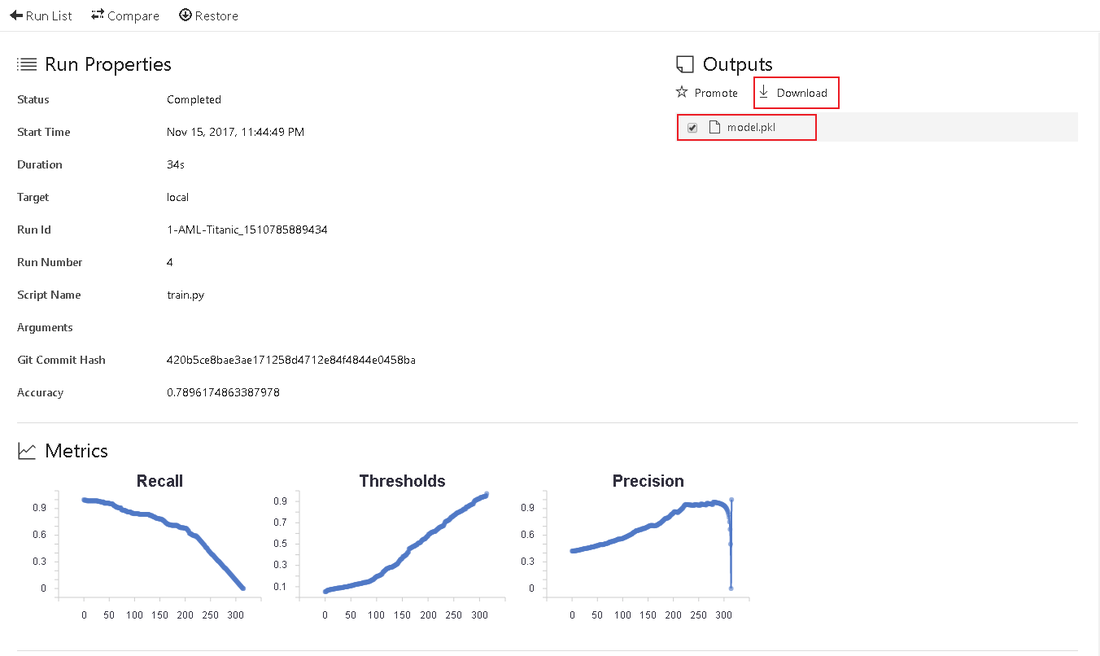 This file is used in our second script - score.py. This file loads the model.pkl and tests it against predefined test data. The result is a JSON-Object. You can find it in the Jobs history under the score.py section. Selecting a certain Job in the list will take you to a detailed overview. To publish the model, we have to perform these actions:
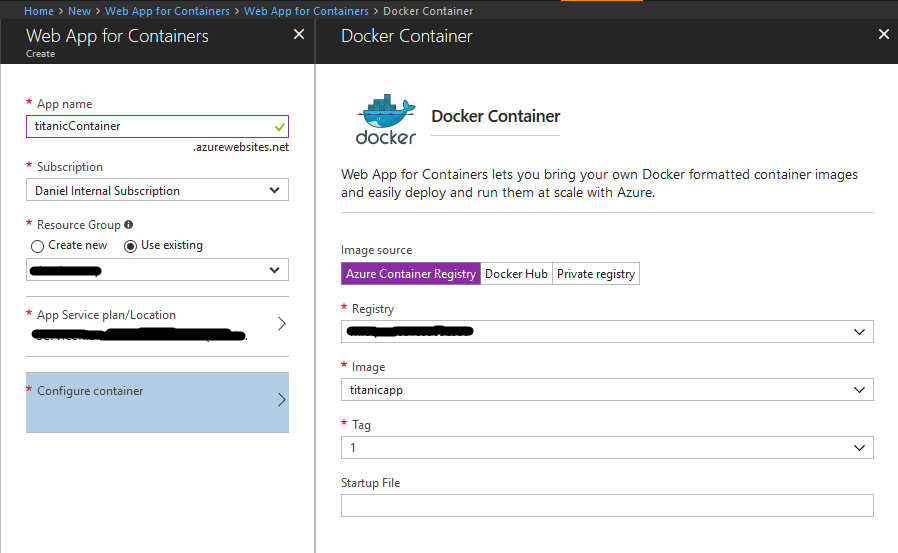
[Optional] Deploy the model in the cloudTo upload the docker file to Azure, we just have to create a Web Service for Containers in Azure. As the last command (deploy web service in one command) created a Docker image and also an Azure Container Registry, this is fairly easy to do:
Summary
What we did:
https://github.com/angelopolotto/XamarinLabCognitiveServices Creating a Face Service API Service From the Azure portal, click New : 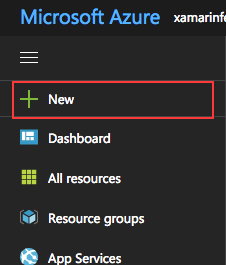 Enter Face API in the search field and create a new service: 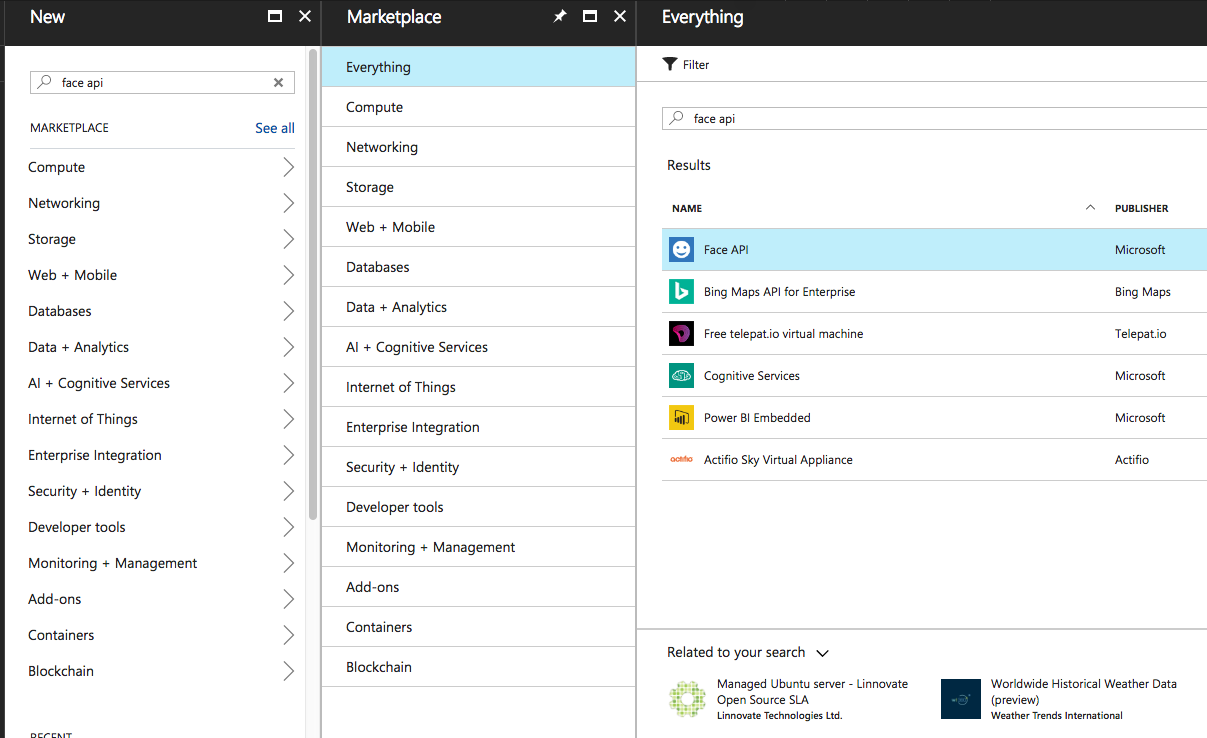 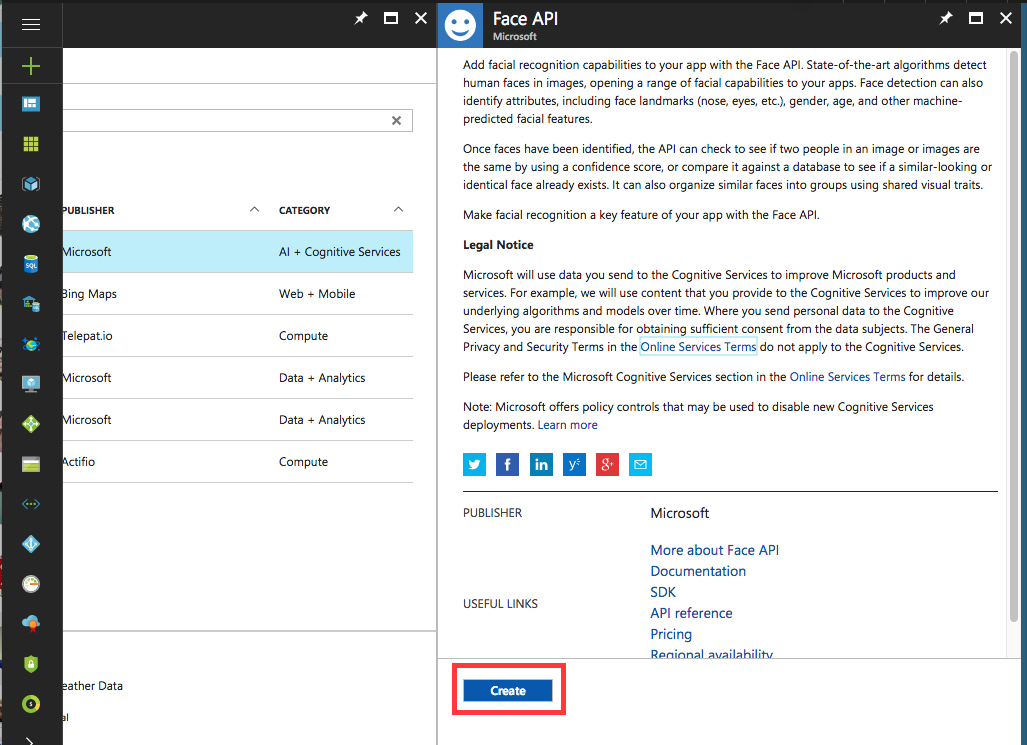 Fill in the data and click Create : 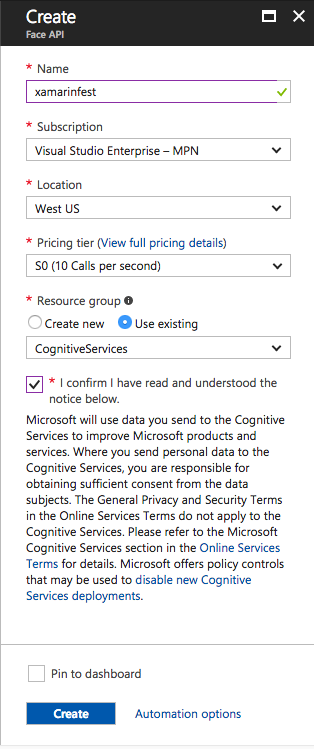 Wait for Azure to create the service:  Go to All resources and choose from the created service and then from Show access keys : 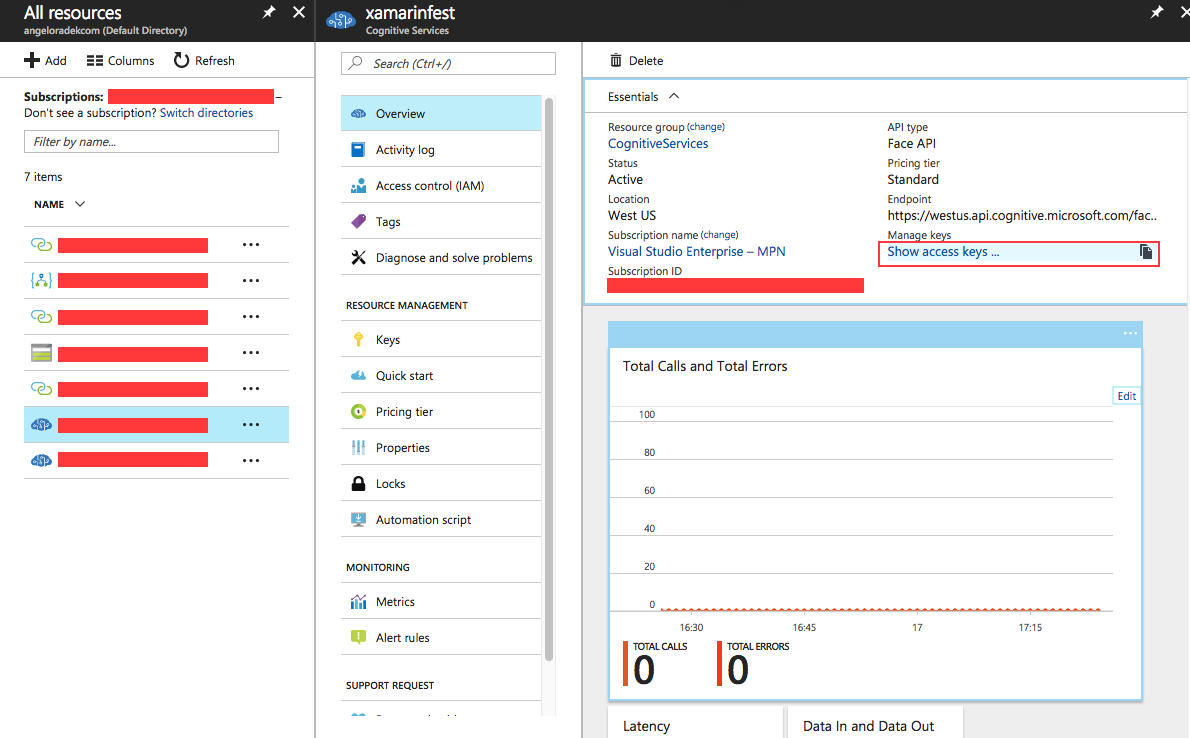 Copy the value of KEY 1 and save it 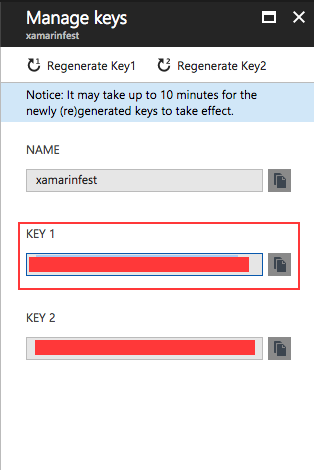 The library code that will be used to access the Cognitive Face can be found in this repository . Copy the snippet and code below and paste it into the CognitiveSercies.Service / Person.cs file : Copy the snippet and code below and paste it into the CognitiveSercies.Service / Services.cs file : Still in the same file, substitute the yourToken text for the Azure copied token: Create a name for your group of people: Add people to your list. Photos can be grabbed by Facebook by right-clicking and copying the URL of the image as long as the image is public.Note: To test the application, you need a photo containing all the people on the list. To facilitate, one can get url of Facebook photos of the people present at the event and take a photo together to test. Note 2: To facilitate, I used these images , taken from the Microsoft repository , to facilitate the tests. Select a platform you want to run (Android or iOS) from the project and click Run . The following images show the application in an iPhone simulator: Recognition of people in the photo: Important points of the code created: Insider Dev Tour Date : 23 June (Singapore) and 26 June (Malaysia) Location : Singapore - Microsoft Singapore Malaysia - Microsoft Malaysia Time : 8.30 am - 5pm (Singapore) 9.30 am - 4.30pm (Malaysia) Register @ https://insiderdevtour.com/  In my previous article, I gave a brief introduction to Azure and Cognitive Services, and I made the analysis of the photos with Xamarin. Today, with Text Analytics at Cognitive Services, we will provide analysis of what we have received (ie text) from the user and check the emotion state, topic titles, and which dictation it is in. What will this provide us? In what emotions, on which dots are the most used, what topics are emphasized, which words are used the most when the user uses the application, and so on. and we will be able to collect more data from our users and improve our practice in the direction of our shortcomings. Then let's go to practice First we create a service that we will use on Azure. Remember to note the Key after you create it. 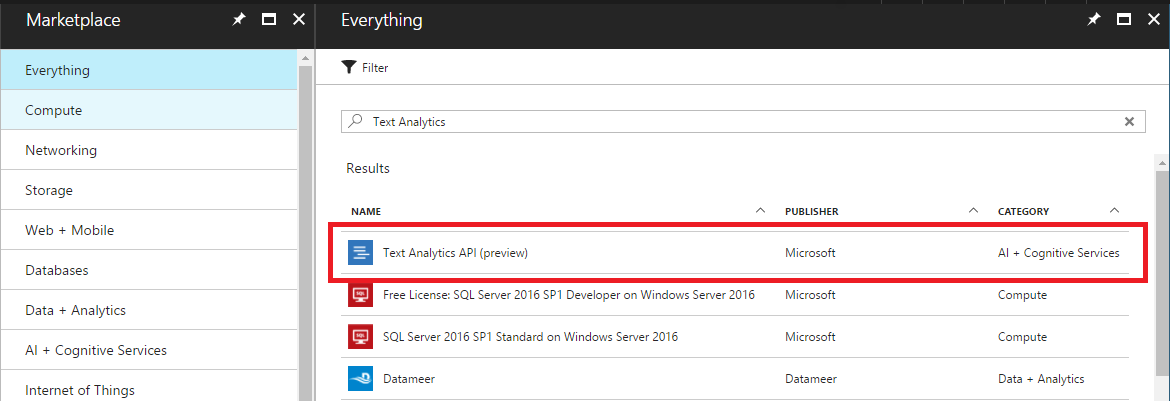 Then we open the PCL project and add Microsoft.Bcl.Build, Microsoft.Bcl, HttpClient and Newtonsoft.JSON packages from NuGet to the project. These other first if what he's writing I would recommend reading. After that, I wrote Xamarin with MVVM for readability. I've also used custom classes like ListViewItemSelected because I'm using MVVM. First of all, I created models to send as body. I created a separate body for Language Detect. I have also created separate models for this and returning data. I would recommend the site json2csharpfor creating these models . We sent our data in Xamarin and wrote the service to get the results (if you do not know this part, do not hang it up too much). We need to serialize the data you get here to the body model. We will receive an answer based on the data we send as servise json. Do not show how it works |

Archives
June 2020
Categories
All
|
Photos used under Creative Commons from derkamener1984, justgrimes
